Maintaining the integrity and appearance of stucco surfaces is essential for preserving the aesthetic appeal and structural durability of a building. Whether you’re a professional contractor or a dedicated DIY enthusiast, mastering the art of stucco repair is a valuable skill. In this article, we will explore the ten key steps that are vital to achieving a successful stucco repair project. By following these steps diligently, you can ensure a high-quality and long-lasting repair that meets professional standards.
I. Assessing the Damage
The first step in any stucco repair project is a comprehensive assessment of the damage. Conduct a thorough inspection of the stucco surface, paying attention to any cracks, chips, or areas of deterioration. It is crucial to identify underlying issues, such as water infiltration or structural problems, as they may require specific remediation. By understanding the full extent of the damage, you can plan your repair strategy effectively and address any potential complications.
II. Preparing the Work Area
Before diving into the repair process, it is vital to prepare the work area properly. Clear the surroundings of any obstacles or debris that may hinder your progress. Protect adjacent surfaces, such as windows, doors, or landscaping, by covering them with plastic sheeting or masking tape. Gathering the necessary tools and materials in advance will streamline the repair process, ensuring you have everything at your fingertips when you need it.
III. Safety Precautions
Safety should always be a top priority when undertaking any construction or repair project. Equip yourself with personal protective equipment (PPE), including safety goggles, gloves, and a respirator mask to protect against dust and fumes. Adhere to proper ladder safety guidelines, ensuring stability and using fall protection if necessary. Maintaining a safe working environment will minimize the risk of accidents and ensure a smooth and successful stucco repair process.
IV. Removing Damaged Stucco
To begin the repair process, start by removing the damaged stucco. Begin from the top and work your way down, using appropriate tools such as a chisel, grinder, or hammer and bolster. Take care not to damage the underlying structure while removing the damaged stucco. This step requires precision and patience to ensure a clean and even surface for the subsequent repair work.
V. Repairing the Substrate
Once the damaged stucco has been removed, it’s time to address any underlying structural issues. Inspect the substrate for any signs of damage or decay, including rotting sheathing or compromised framing. Replace any damaged components to ensure a solid foundation for the new stucco application. Additionally, consider applying moisture barriers to prevent future water infiltration, protecting the integrity of the repair.
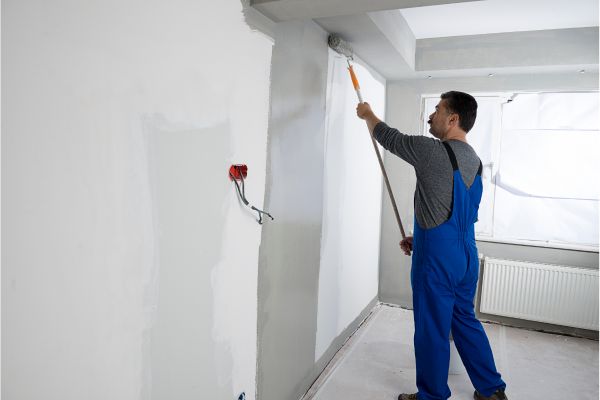
VI. Mixing and Applying Stucco
Achieving the right consistency and application of stucco is crucial for a successful repair. Follow the manufacturer’s guidelines for mixing ratios, ensuring the correct proportions of cement, sand, and water. Thoroughly mix the ingredients to achieve a workable and homogeneous mixture. Apply the stucco evenly and smoothly using a trowel or sprayer, paying attention to achieving the desired thickness and uniform coverage.
VII. Texturing and Blending
To seamlessly integrate the repaired area with the surrounding stucco, careful attention must be given to texturing and blending. Match the existing texture as closely as possible, whether it is a smooth finish, dash finish, or any other desired texture. Utilize various techniques such as troweling, stippling, or using a sponge to achieve the desired texture. Take your time to ensure that the repaired area seamlessly blends in with the surrounding stucco, maintaining the overall aesthetics of the structure.
VIII. Curing and Moisture Control
Allowing sufficient time for the stucco to cure is essential for its long-term durability. Follow the manufacturer’s recommendations for curing time, which typically involves misting the repaired area with water and covering it with a plastic sheet to maintain moisture levels. Additionally, protect the repaired area from excess moisture, avoiding heavy rain or irrigation for the initial curing period. Proper curing will ensure a strong bond, preventing premature cracking or damage to the repair.
IX. Finishing Touches
Once the stucco has cured, it’s time to inspect and finalize the repair. Clean the repaired area, removing any debris or excess material. Evaluate the quality of the repair, checking for any imperfections or inconsistencies. If necessary, apply a protective finish coat to enhance the stucco’s resistance to weathering and enhance its appearance. Taking the time to attend to these finishing touches will result in a polished and professional stucco repair.
Takeaway
Successfully repairing stucco requires attention to detail, skill, and adherence to proper procedures. By following the ten key steps outlined in this article, you can ensure a high-quality and long-lasting stucco repair project. Remember, seeking expert advice or consulting a professional when necessary can provide valuable guidance and expertise. With proper execution and care, you can restore the beauty and integrity of stucco surfaces, safeguarding the structural strength and visual appeal of any building.